
Written by: Paul Foster, Founder, CEO, OnePlan
Best layout at a glance: Place the stage at a dead-end or wide intersection, aim speakers down-street away from homes, keep a 14–20 ft emergency lane open, separate vendor rows from the audience by one sidewalk width, and confirm sightlines and sun angle against surrounding structures.
Key Takeaways for Faster, Safer Street Fair Layouts
- Stage placement at a dead-end or wide intersection prevents crowd bottlenecks and speeds permit approval by keeping a clear 14–20 ft emergency lane.
- Orienting speakers down-street away from homes reduces noise complaints and helps satisfy local sound ordinances before the event begins.
- Separating vendor rows from the audience zone by one sidewalk width keeps pedestrian flow smooth and avoids last-minute layout changes.
- Verifying sightlines and sun angles during planning removes glare issues and reduces costly day-of adjustments.
- OnePlan lets you build a to-scale street-fair plan in minutes and export permit-ready maps, so you can book a free 15-minute demo and see the workflow in action.
Street Festival Stage Layout: Five Steps to a Permit-Ready Plan
The five steps below follow a fixed sequence: location first, then orientation, then emergency access, then vendor separation, then sightlines. Skipping ahead creates rework and confusion. Each step produces a documented decision that feeds directly into your permit application.
Step 1: Fix the Stage at a Dead-End or Wide Intersection
Objective: Anchor the stage where the street naturally terminates or widens so the audience can spread out and the stage does not create a mid-block pinch point.
Inputs: Measured street width, block length, and the location of intersecting cross-streets. A to-scale base map is essential here, because estimated widths drawn by eye often miss reality by 10–15 feet.
Decision: A dead-end placement backs the stage against a fixed boundary, which gives the production team a clear backstage zone and pushes the audience in one direction only. A wide-intersection placement works when no dead-end exists, but it requires closing the cross-street or designating that cross-street as the emergency lane.
Trade-offs: Dead-ends limit the event footprint to a single block. Wide intersections support multi-block layouts but add permitting complexity, because each cross-street closure needs its own authorization. Cities including Phoenix require a Parks Department Street Special Event Application for any event in the public right-of-way, and the diagram must show the full closure geometry. This requirement makes a to-scale base map a prerequisite for every other decision.
Step 2: Aim the Stage and Speakers Down the Street
Objective: Direct amplified sound toward the open audience zone and away from residential facades.
Inputs: A residential proximity map that shows which building faces sit within the sound-projection path, plus the local noise ordinance limit. As one example, Nashville and Davidson County prohibit amplified sound that is plainly audible from the boundary line of the nearest residentially occupied property. Limits vary by jurisdiction, so confirm the applicable rule with your local authority.
Decision: Point the speaker stacks down the longest available run of closed street. Outdoor sound, especially bass from subwoofers, travels farther than expected without walls or surfaces to contain it. The orientation choice therefore becomes your primary noise-control tool before the event starts. Placing speakers closer to the audience at lower output levels usually reduces spill toward nearby homes more effectively than turning up a distant rig.
Trade-offs: Down-street orientation maximizes throw distance into the audience zone but may conflict with the sightline check in Step 5 if the street bends. Some jurisdictions prescribe orientation by ordinance. San Francisco’s Front Street permit, for example, requires amplified sound equipment to face and project south toward Market Street except for a small number of named annual events. Local rules can override general best practice, so always check them early.
Step 3: Keep Intersecting Streets Open for Emergency Vehicles
Objective: Maintain a continuous, unobstructed lane wide enough for fire apparatus and ambulances across the entire event footprint.
Inputs: Local fire department clearance requirements, which vary by city. As illustrative examples, Boston requires an unobstructed emergency access lane on public streets, while Asheville requires a fire lane with overhead clearance, with the Asheville Fire Department holding final authority. Always confirm the applicable width with your local fire authority, because requirements differ across jurisdictions.
Decision: Map the emergency lane before placing any infrastructure. The lane must run from the nearest open street to the stage and back out, either as a loop or a straight-through path. Avoid any dead-end spur that traps apparatus. Beyond the lane itself, fire access also depends on hydrant availability. Boston also requires clearance on both sides of each fire hydrant, so hydrant locations must appear on the plan before stages, generators, or fencing are positioned.
Trade-offs: A wider emergency lane reduces the usable audience zone. On a 40-foot street with a 20-foot emergency lane, only 20 feet remain for audience, vendor, and production use. That constraint must be resolved at the layout stage, not on event day.
Step 4: Separate Vendor Rows from the Audience Zone
Objective: Create a clear physical boundary between the commercial vendor corridor and the standing audience area so pedestrian flow does not collapse into a single undifferentiated mass.
Inputs: The confirmed vendor list with booth footprints, the street width remaining after you reserve the emergency lane, and the sidewalk width on each side.
Decision: Position vendor rows along the sidewalk line on each side of the street. Use one sidewalk width as the separation buffer between the vendor face and the audience zone edge. Flow data from linear street-fair layouts shows that a normally two-way pedestrian street can become a one-way bottleneck during peak periods when vendor and audience zones are not physically separated. Defining each zone as a distinct area with its own capacity number enables targeted monitoring and intervention.
Trade-offs: Wider vendor separation improves flow but reduces the number of vendor pitches available. Narrower separation increases pitch count but raises the risk of crowd compression in front of the stage. Use OnePlan’s standing crowd capacity calculator to outline each zone and check occupancy figures before you finalize the layout. For arrival and exit flow estimates, OnePlan’s free arrival calculator and exit calculator provide a practical starting point.
Asheville also requires a minimum pedestrian clearance on any sidewalk that remains open during a street closure. This rule shows how vendor placement decisions interact with pedestrian-access requirements, so confirm the applicable clearance with your local authority.
Step 5: Verify Sightlines and Sun Angles
Objective: Confirm that the audience has an unobstructed view of the stage and that neither performers nor attendees face direct sun during the event window.
Inputs: Street orientation (compass bearing), event start and end times, and the location of any overhead obstructions such as canopies, awnings, or utility lines.
Decision: On an east-west street with a daytime event, a stage at the west end means the audience faces east in the morning and the sun sits behind them, which is favorable. The same stage in the afternoon puts the sun directly in the audience’s eyes. On a north-south street, a south-facing stage keeps the sun behind the audience for most of a northern-hemisphere daytime event. The principle mirrors guidance used in other siting disciplines. FAA airport tower siting guidance recommends orienting primary sightlines away from the sun for most of the day, keeping the main view pointed north where feasible.
Trade-offs: The optimal sun orientation may conflict with the noise-control orientation from Step 2 or the emergency-lane geometry from Step 3. When conflicts arise, emergency access takes priority, noise compliance comes second, and sun angle is resolved through scheduling changes or temporary shade structures.
Pre-Submission Verification Checklist: 14 Items to Confirm Before You Apply
Now that you have worked through the five positioning steps, use this checklist to confirm that you have documented every decision before submitting your permit application. The checklist covers all the decisions and measurements from the five steps above, plus the supporting documentation your permit application will need. It mirrors the line items that OnePlan auto-generates in its Bill of Quantities export when a street fair plan is built to scale on the platform.
- Street width and block length confirmed from measured source
- Stage position fixed at dead-end or wide intersection
- Speaker orientation documented (compass bearing, target zone, nearest residential facade distance)
- Emergency lane width confirmed against local fire department requirement and marked on plan
- Fire hydrant locations plotted with required clearance radius shown
- Vendor booth footprints placed with separation buffer from audience zone
- Pedestrian clearance on open sidewalks confirmed against local requirement
- Sun angle checked for event start, peak, and end times
- Overhead obstructions (canopies, utilities) marked on plan
- Crowd capacity calculated for each zone (audience, vendor corridor, backstage)
- Generator and temporary power locations placed with required permit noted
- Waste disposal and backstage logistics areas designated
- Plan exported to high-resolution PNG for permit submission
- Bill of Quantities exported to CSV for contractor and supplier coordination
OnePlan generates items 10 through 14 automatically from the objects placed on the map. Every stage, barrier, generator, and toilet placed on the plan feeds the Bill of Quantities in real time, so the inventory always matches the current layout.
Manual Sketching vs. To-Scale Mapping: A Quick Comparison Framework
Most street fair plans start as a hand sketch or a screenshot with shapes dropped on top, and that approach creates three structural weaknesses that compound as the event grows.
Version control breaks down the moment the file is emailed. The operations lead, the fire department liaison, and the vendor coordinator each end up with a different version. Reconciling those versions before the permit deadline costs hours that could be spent on the plan itself. OnePlan’s real-time collaboration keeps every department on one live plan simultaneously.
Stakeholder alignment fails when the plan is not to scale. A stage that looks appropriately sized on a sketch may occupy 60% of the usable street width when measured, which surfaces during the site visit instead of during the desk review. OnePlan’s base layer uses a live satellite or street map built on leading GIS technology, and every object placed on it stays accurately to scale at any zoom level.

Accuracy gaps create permit delays. Permit reviewers in cities including New Orleans require a plot plan showing property boundaries, stage location and dimensions, and distance to the nearest fire hydrant. A sketch cannot reliably produce those measurements. A to-scale OnePlan export can, and it exports to a print-ready PNG at up to A0 size.
Common Stage Layout Challenges and How to Reduce Risk
Three planning errors account for most last-minute permit rejections and event-day corrections at street fairs.
Incorrect scale. A stage drawn at 24 feet wide on a 30-foot street leaves 6 feet for everything else, but that constraint stays invisible in a non-scaled sketch. Building the plan on a to-scale map surface makes the constraint visible at the design stage, when you can still resolve it.
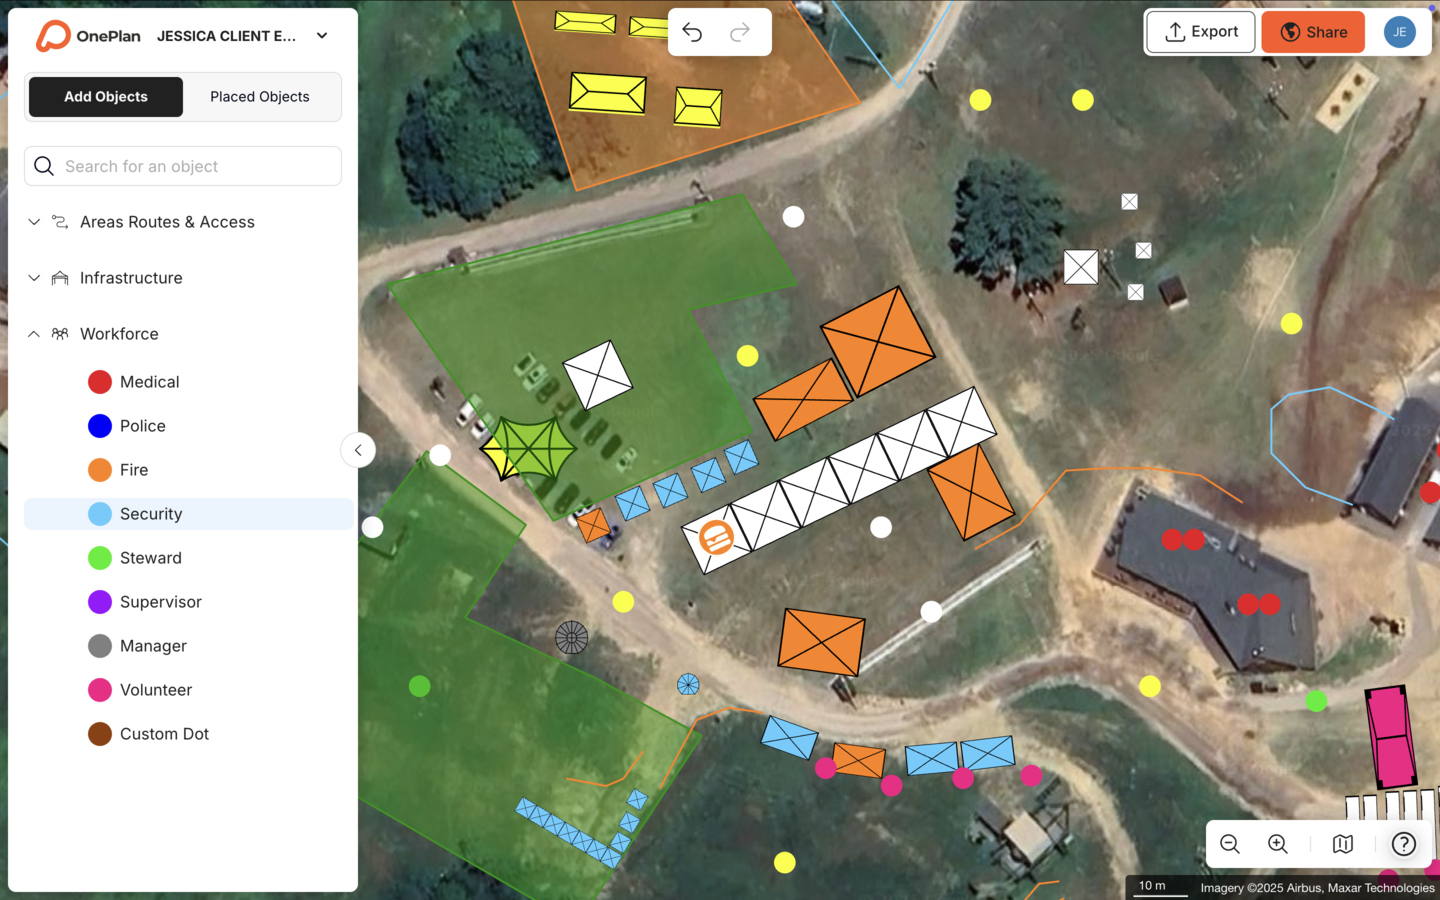
Multiple plan versions. When operations, fire, and vendor teams each maintain their own PDF, the plan submitted for permitting may not match the plan used for vendor briefings. A single live plan eliminates that divergence. Eagle Mountain City, a local government customer, moved from separate department maps to one shared OnePlan layout and cut planning time by 70%, from 8–10 hours down to a few hours per event, achieving an estimated 5x return on investment.
Underestimated barrier quantities. Ordering too few crowd barriers leaves gaps in the audience zone boundary, while ordering too many wastes budget. OnePlan’s Bill of Quantities counts every barrier segment placed on the map and exports the total to CSV, which removes guesswork from procurement.
Success Indicators: Fewer Site Visits and Faster Approvals
A well-executed street fair stage positioning process produces measurable outcomes before the event opens.
- Permit applications submitted with a to-scale plan and accurate measurements require fewer revision rounds from the reviewing authority.
- Fire department and police reviews proceed faster when the emergency lane, hydrant clearances, and crowd zones appear clearly marked on a dimensioned plan.
- Site visits drop because layout decisions are validated at the desk rather than on the street. The Beirut Marathon cut approximately 20 pre-event site visits per year down to two after moving to to-scale planning in OnePlan.
- Vendor briefings require fewer corrections when booth positions are drawn to scale and each vendor receives a plan that reflects actual street dimensions.
- Event-day adjustments decrease because the layout has already been stress-tested against emergency access widths, crowd capacity figures, and sun angles.
Advanced Considerations for Recurring and Growing Street Fairs
Annual street fairs benefit from reusable plan templates that carry forward each year’s learning. Once a to-scale layout is built in OnePlan, you can duplicate it for the following year, update it with new vendor assignments, and export it again for the permit cycle without rebuilding from scratch. SoulFest, one of New England’s largest music festivals, built almost its entire site map in two days after switching to OnePlan, cutting planning time by 85%.
Multi-block street fairs that expand year on year benefit from a living plan that grows with the event. Adding a second stage block, extending the vendor corridor, or rerouting the emergency lane becomes an edit on the existing map rather than a new document. Every department, including operations, public works, police, and fire, works from the same updated plan instead of receiving a new emailed PDF.
Post-event refinement also becomes easier when the plan is digital. Notes on which vendor zones had the highest dwell time, where crowd compression occurred, and where the emergency lane was tested feed directly into the following year’s layout decisions, all within the same platform.
Frequently Asked Questions
How far in advance should a street fair stage permit application be submitted?
Timelines vary significantly by city and event size. As illustrative examples, San Francisco suggests applying at least 3 months in advance for new street closure events (or 6 months for large events) and requires applications at least 30 days in advance for block parties. San Francisco Entertainment Commission permits for events typically take six weeks, with large venues recommending booking 6–18 months ahead as a best practice rather than a city requirement. Santa Clara requires submission at least 60 days before the event. Asheville has specific timelines depending on the permit type, with additional time recommended for preparing a site plan and securing separate approvals for fire, electrical, and sound. Confirm the applicable deadline with your local permitting authority well before you begin the application process, and build plan preparation time into your schedule before the submission deadline.
What emergency lane width does the fire department typically require at a street fair?
Emergency lane width is set by the local fire authority and varies by city. See Step 3 for illustrative examples from Boston and Asheville, and confirm the applicable requirement with your fire department before you finalize your layout. Hydrant clearances are a separate requirement and must also be checked locally.
Does the stage need a structural engineer’s sign-off?
Many jurisdictions require a licensed engineer or architect to certify temporary stage structures above a certain height or load threshold. As one example, New Orleans requires documentation for its stage permits. Phoenix requires a building permit for any stage or platform higher than 30 inches. Requirements vary by state and city, so confirm the applicable structural certification requirement with your local building or permits department early in the planning process.
How should sun angle affect stage orientation decisions for a daytime street fair?
The sun’s position relative to the stage and audience changes throughout the day and varies by street orientation. On an east-west street, a stage at the west end means the audience faces east, which works in the morning but becomes problematic in the afternoon when the sun moves into the audience’s line of sight. On a north-south street, a south-facing stage generally keeps the sun behind the audience for most of a daytime event in the northern hemisphere. When the optimal sun orientation conflicts with noise-control or emergency-access requirements, those safety and compliance factors take priority, and sun angle is managed through event scheduling or temporary shade structures.
How do I scale a street fair plan from one block to a multi-block route?
The same five-step process applies at each block, with additional coordination required at every cross-street intersection. Each intersection must be assessed for emergency access continuity, because the lane must connect across the full route, not just within individual blocks. Each block’s crowd zone and vendor corridor must be planned independently with its own capacity figure, and the connections between blocks must be wide enough to handle peak flow between zones. A to-scale map that covers the full route is essential for multi-block planning because the interactions between blocks, where crowd flow from one zone feeds into the next, stay invisible in block-by-block sketches. OnePlan’s map canvas covers any geography, so a multi-block route is planned on the same surface as a single-block event, with the full street network visible at any zoom level.
Conclusion: Start Your First Street Fair Plan Free
Street fair stage positioning follows a sequence of interdependent decisions, including location, orientation, emergency access, vendor separation, and sightlines. Each decision affects the others and must be documented accurately for the permit application to succeed. A to-scale plan is not a nice-to-have; it forms the foundation that makes every other decision defensible.
OnePlan turns that process into a same-day task. Drag and drop a stage onto a live satellite map, place vendor booths to scale, mark the emergency lane, calculate crowd capacity for each zone, and export a print-ready permit map and Bill of Quantities. You can do all of this from a browser, with no engineering background required. From a community street fair to events planned across 150 countries, OnePlan serves as the single source of truth that keeps every department on the same plan.