
Written by: Paul Foster, Founder, CEO, OnePlan
Key Takeaways for Your Market Fencing Plan
-
A community-market fencing calculator gives you exact linear feet, posts, gates, concrete, and total cost while accounting for spacing, corners, and openings.
-
Measure the full perimeter on a map or site, sum all segments, and add a small buffer for waste and last-minute adjustments.
-
Apply standard post-spacing rules, such as one post every 6–8 ft, and add extra posts for every corner, terminal, and gate opening.
-
Subtract gate widths from the fenced run, calculate required panels or rolls by fence type, and estimate concrete only when permanent-style footings are needed.
-
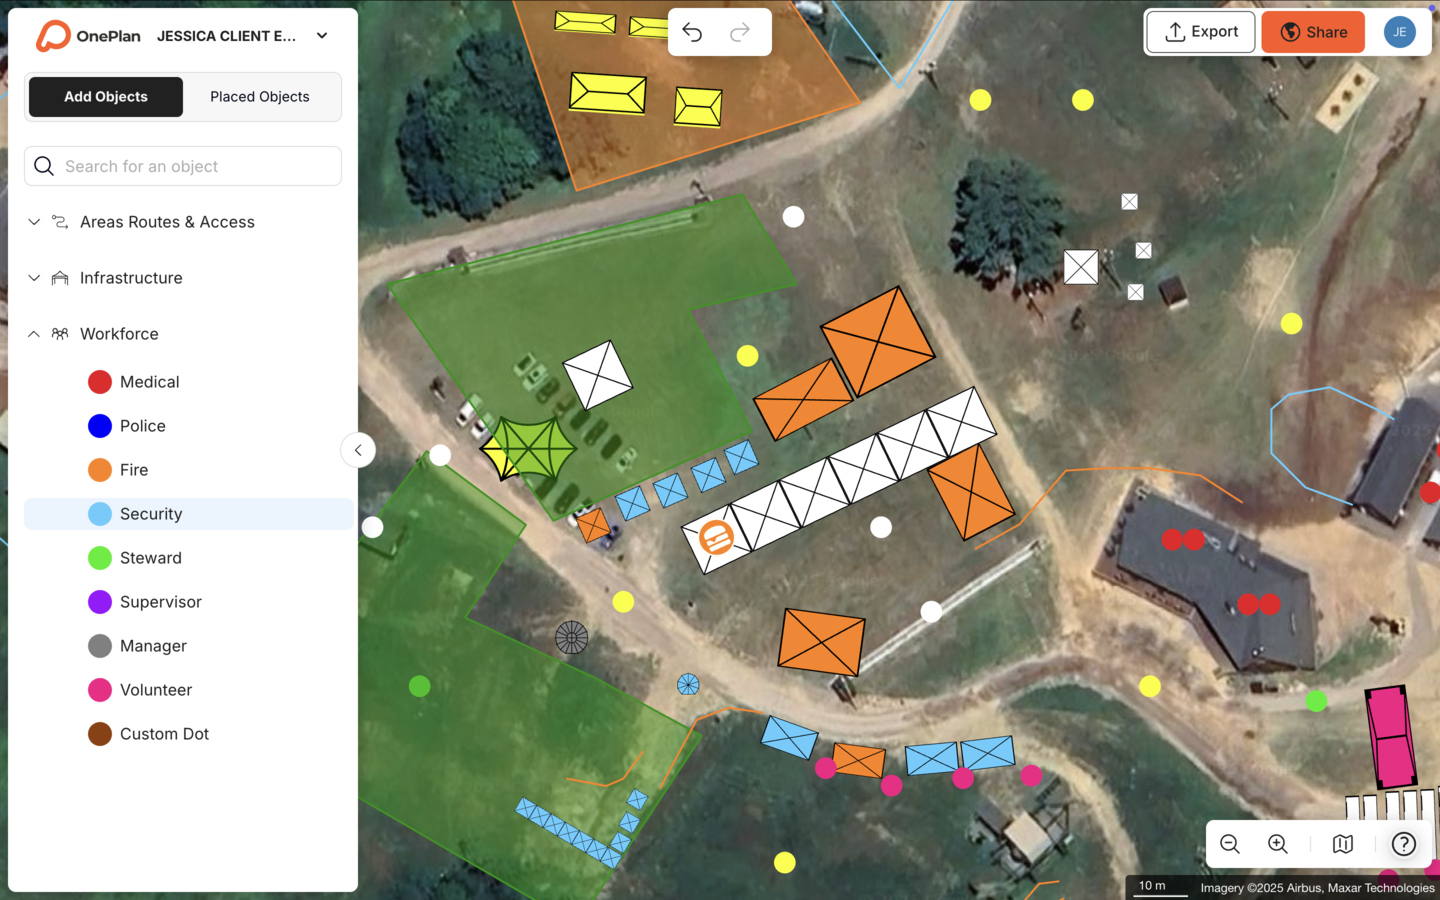
OnePlan lets you drag fencing objects onto a live satellite map so the Bill of Quantities updates automatically. See this automatic calculation feature in a walkthrough.
Step 1: Measure Linear Footage on a Map or On Site
Start by tracing the full perimeter of your market footprint so you know exactly how much fencing you need. Walk the boundary or use a to-scale map tool to measure each straight run. Add every segment together to get your total linear footage.
-
Sketch the site as a simple polygon and label each side in feet.
-
Add all side lengths: Total Linear Feet = Side A + Side B + Side C + …
-
Add a small waste and adjustment buffer before ordering, typically around 5–10%.
Remote measurement on an up-to-date satellite map keeps you from making repeated manual site visits and gives you a defensible number before you commit to a supplier quote.

Step 2: Apply Post-Spacing Rules for Line, Corner, and Terminal Posts
Post count drives a large share of your material and labor costs, so set your spacing rules early. Use these rules as your baseline:
-
Line posts: one post every 8 ft for chain-link or every 6–8 ft for wood panel.
-
Corner and terminal posts: one at every 90° turn and at each end of a run.
-
Formula: Line Posts = (Linear Feet ÷ Spacing) − 1, then add corner and terminal posts separately.
Here is how this formula works in practice with a smaller perimeter. For a 400-linear-foot perimeter with 8 ft spacing and four corners: (400 ÷ 8) − 1 = 49 line posts + 4 corner posts + 2 terminal posts = 55 posts total.
Check spacing rules against your local jurisdiction’s temporary-structure guidelines, because local codes often specify minimum post spacing or bracing.
Step 3: Calculate Gates, Hardware, and Openings
Every gate opening reduces your fenced run and adds hardware cost, so plan these carefully. Place gates around vendor access, emergency egress, and pedestrian flow before you finalize quantities.
Start by identifying the number and width of each opening, such as two 10 ft vehicle gates and four 4 ft pedestrian gates. Once you know your total gate width, subtract it from your linear footage before calculating panels: Fenced Run = Total Linear Feet − Total Gate Width. This adjusted footage determines your panel or roll count.
Gates also add their own material requirements. Each gate requires two gate posts, usually a heavier gauge than line posts, plus hinges, latches, and drop rods. Before you lock in these quantities, confirm that your emergency-access gates meet local fire and safety authority requirements, because your authority having jurisdiction may require specific widths that change your gate count.
Step 4: Estimate Concrete Volume per Post
Temporary event fencing often uses driven or weighted posts instead of concrete footings. When concrete is required for permanent-style temporary installs or hard surfaces, use this formula:
-
Hole volume (cubic feet): π × (hole radius in ft)² × hole depth in ft
-
A standard 4-in-diameter hole at 2 ft depth = 3.14 × (0.167)² × 2 ≈ 0.175 cu ft per post
-
Multiply by post count: 80 posts × 0.175 = 14 cu ft ≈ 0.52 cubic yards of concrete
Truly temporary markets that use Heras-style panel fencing with weighted feet usually do not need concrete. Confirm footing requirements with your permit authority before you place an order.
Step 5: Tally Material Quantities by Fence Type
Different fence types produce different quantity lists, even for the same perimeter. Use the table below as a starting framework:
|
Material |
Panel/Section Width |
Sections for 560 ft run* |
Posts Required |
|---|---|---|---|
|
Heras / temp panel |
10 ft |
56 panels |
57 uprights + weighted feet |
|
Chain-link |
Roll (50 ft) |
12 rolls |
80 posts (8 ft spacing) |
|
Wood privacy |
8 ft |
70 sections |
80 posts (8 ft spacing) |
|
Vinyl |
6 ft |
94 sections |
95 posts (6 ft spacing) |
*560 ft = 600 ft total minus 40 ft of gate openings. Quantities are illustrative, so confirm against your supplier’s panel dimensions.
Try the live fencing calculator yourself in OnePlan: drag objects onto your site map to watch quantities update as you plan.
Step 6: Build a Cost Estimate for Your Fencing Budget
Once you confirm quantities, apply unit costs to build your fencing budget. Costs vary by region, supplier, and season, so treat these as placeholder rates and collect several quotes before you finalize.
|
Line Item |
Unit |
Example Qty (600 LF) |
Indicative Unit Cost |
|---|---|---|---|
|
Heras panels (rental) |
Per panel/week |
56 |
$8–$15 |
|
Weighted feet |
Per foot |
57 |
$2–$4 |
|
Vehicle gate (10 ft) |
Per gate |
2 |
$50–$120 |
|
Pedestrian gate (4 ft) |
Per gate |
4 |
$25–$60 |
|
Delivery and install |
Flat or per mile |
1 |
$150–$400 |
Add a contingency line, usually around 10–15%, for last-minute changes, damaged panels, or permit-driven layout revisions that affect your order.
Step 7: Export a Bill of Quantities and Printable Map
A completed fencing estimate delivers the most value when it travels with the site plan. Permit reviewers, fire marshals, and contractors all need the same picture and the same numbers. OnePlan’s Bill of Quantities tool automatically tallies items placed on a site map and calculates infrastructure needs for sourcing from suppliers, turning a finished map into an exportable CSV without re-keying a single number.
Export outputs should include a high-resolution, print-ready site map showing fencing runs, gate locations, and vendor zones. They should also include a line-item Bill of Quantities with quantities and unit costs, plus a perimeter summary with total linear feet, post count, and gate count for the permit application.
Common Challenges and Troubleshooting Tips
-
Irregular site shapes: Break the perimeter into straight segments and sum them. Curved runs often need shorter panel sections or flexible barrier systems.
-
Terrain changes: Slopes may require racking adjustments or stepped panels. Add around 5–8% to post count for uneven ground.
-
Permit-driven layout changes: Late gate relocations or perimeter shifts are common. Build your plan in a live tool so changes update the Bill of Quantities automatically instead of forcing a full manual recalculation.
-
Vendor encroachments: Food stall awnings and trailer tongues often extend beyond the vendor footprint. Confirm clearances before you finalize fencing runs next to vendor rows.
-
Under-ordering: Always add a small buffer. A single missing panel on setup day causes delays that cost far more than the panel itself.
OnePlan provides an accurate to-scale map and hundreds of items of event infrastructure that allows me to quickly build an event site, so layout changes update quantities instantly instead of triggering a manual recalculation.
Test this instant-update workflow on your next market — your first event plan is free.
Measuring Success for Your Fencing Plan
Accurate fencing calculations reduce three measurable costs: over-ordering, under-ordering, and re-work on event day. Track these metrics across events to build a baseline:
-
Variance between ordered and used panels, with a target under 5%
-
Number of permit revision rounds driven by layout changes, with a target of one round
-
Time from site measurement to approved permit map, with a target under one working day when you use a live planning tool
The Orkney 2025 International Island Games team found that the pedestrian barrier calculator feature “was magic” and made ordering so much easier, which directly reduced the variance between estimated and actual quantities.
Frequently Asked Questions
How do I calculate the number of fence posts for a community market perimeter?
Divide your total fenced run, which is linear footage minus gate openings, by your chosen post spacing in feet. Subtract one to get line posts. Add corner posts, one per 90° turn, and terminal posts, one at each run end, separately. For example, a 564-foot fenced run at 8-foot spacing produces 69 line posts plus corner and terminal posts. Always round up, never down, and add a small buffer for damaged or missing posts discovered on delivery day.
What is the difference between temporary event fencing and permanent fencing calculations?
Temporary event fencing, such as Heras panels and crowd barriers, uses pre-built panel sections with fixed widths, so your calculation is primarily a panel count instead of a linear-foot material takeoff. Permanent fencing, such as wood, chain-link, or vinyl, requires calculating linear footage of material, individual post count, concrete volume, rails, and pickets or mesh. For community markets, temporary panel systems are most common because they require no concrete, install quickly, and can be reconfigured if the permit authority requests layout changes.
How many gates does a community market typically need?
Gate count depends on your site’s pedestrian flow, vendor access requirements, and emergency egress rules set by your local authority having jurisdiction. As a general planning rule, most community markets include at least one vehicle access gate per vendor entry point and one pedestrian gate per 150–200 linear feet of perimeter. Emergency access gates must meet the minimum width requirements of your local fire authority, so confirm these before you finalize your layout. Every gate opening reduces your fenced run and adds hardware cost, so finalize gate placement on your site map before you order panels.
Can I use OnePlan to calculate fencing quantities automatically?
Yes. OnePlan’s drag-and-drop platform lets you place fencing objects directly onto a live, to-scale satellite map of your market site. As you draw fencing runs and place gates, the platform’s auto-generated Bill of Quantities tallies every item placed on the map and exports the full inventory to Excel or CSV. Your panel count, post count, gate count, and cost estimate update automatically as you adjust the layout, so you avoid manual recalculation. Your first event is free, up to 25 objects, so you can test the workflow before you commit to a paid plan.
How do I account for vendor stalls and internal fencing in my total quantity estimate?
Separate your perimeter fencing calculation from any internal fencing used to create vendor lanes, queue management corridors, or restricted zones. Calculate each internal run as its own segment using the same post-spacing formula, then add all segments together for a site-wide total. In OnePlan, you can draw each fencing run as a separate object on the map, and the Bill of Quantities aggregates every run into one exportable list. That way your permit application and supplier order reflect the full site, not just the outer boundary.
What should a fencing Bill of Quantities include for a permit application?
A permit-ready fencing Bill of Quantities should include total linear footage of each fence type, panel or section count by type, post count, gate count and widths, hardware quantities, and concrete volume if applicable. It should also include a site map showing fencing runs, gate locations, and emergency access points. Some jurisdictions also require the name of the fencing contractor and confirmation that temporary structures meet local wind-load or safety standards. Always check with your local permitting authority for the specific documentation required in your area.